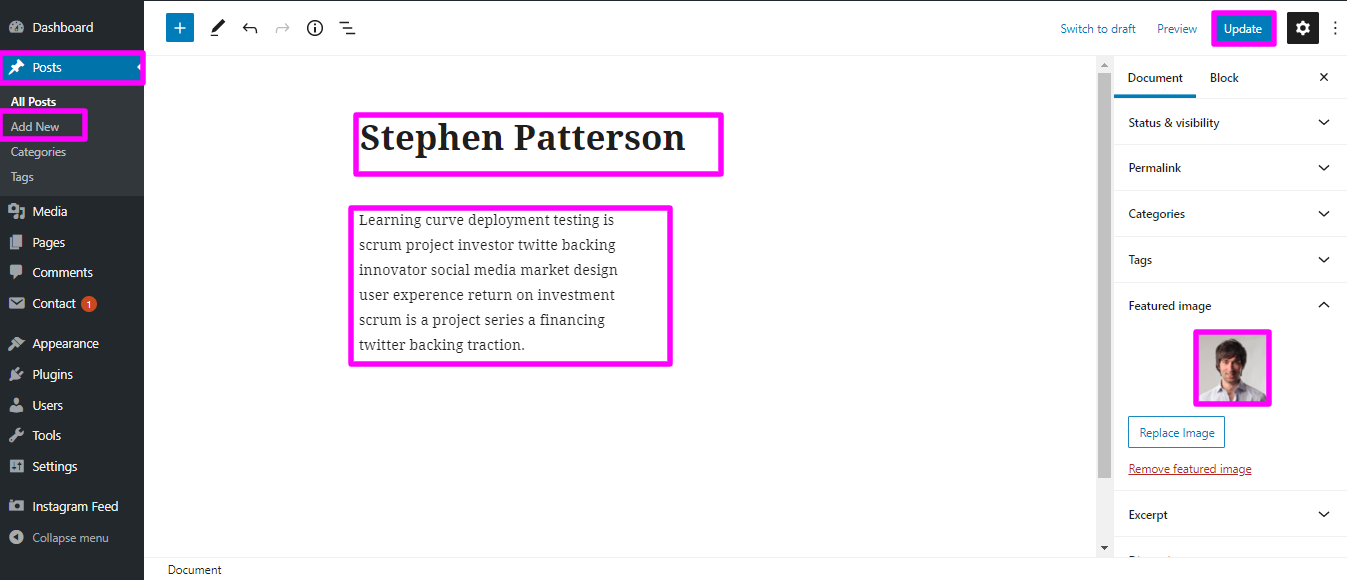
Widgets

The downloaded template package comprises multiple folders. Now, let's take a look at brief description of the contents for each folder?
Sccreenshots - displays template screenshots. Do not use these for creating templates
Theme - carries WordPress files
"geschaft-pro" -The indicated folder has all the required files regarding the theme.
The file "license.txt" includes information about the licensing terms.
Template installation is a quite simple process. The installation process can be executed in two methods..
The initial step you should take is to Step #1 : Login WordPress Admin
1. Now Go forAppearance →then naviagate to themes
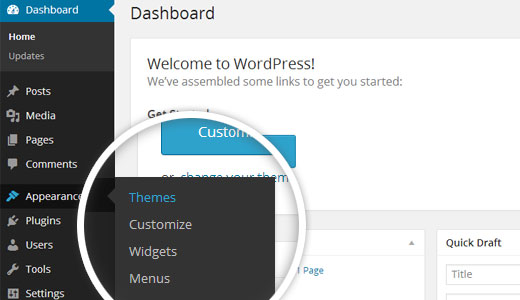
2. Tap Add New
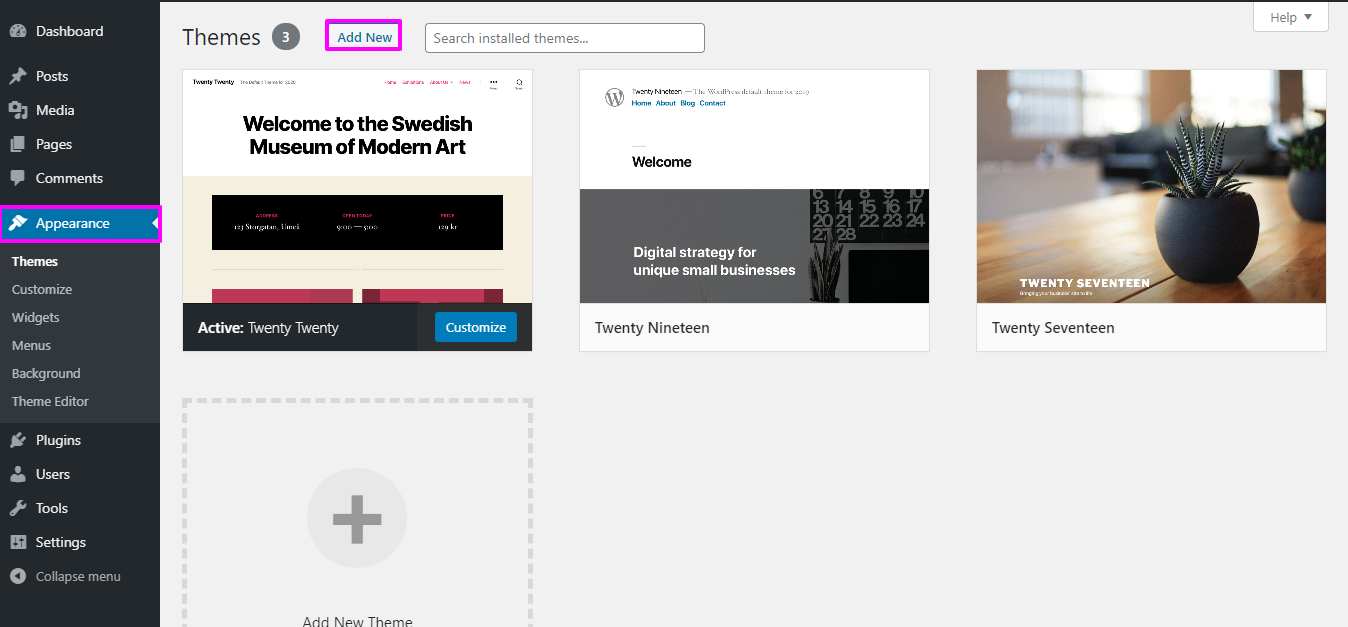
3. Appearance →then naviagate to themes'.

4.Now Upload your previously downloaded geschaft-pro theme.

good going your them installation has been accomplished.
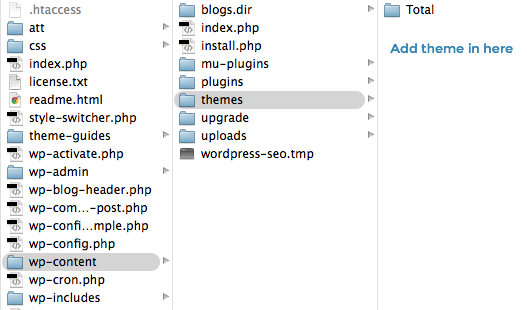
The second installation option involves uploading the theme via FTP. Apply this methodology., first Access your website by logging via FTP and Navigate to the themes folder inside wp-content folder. Then, unzip the theme you downloaded and Publish it to server...
Afterward, Sign in to your WordPress site and Now go for Appearance --then Select Themes to activate total.
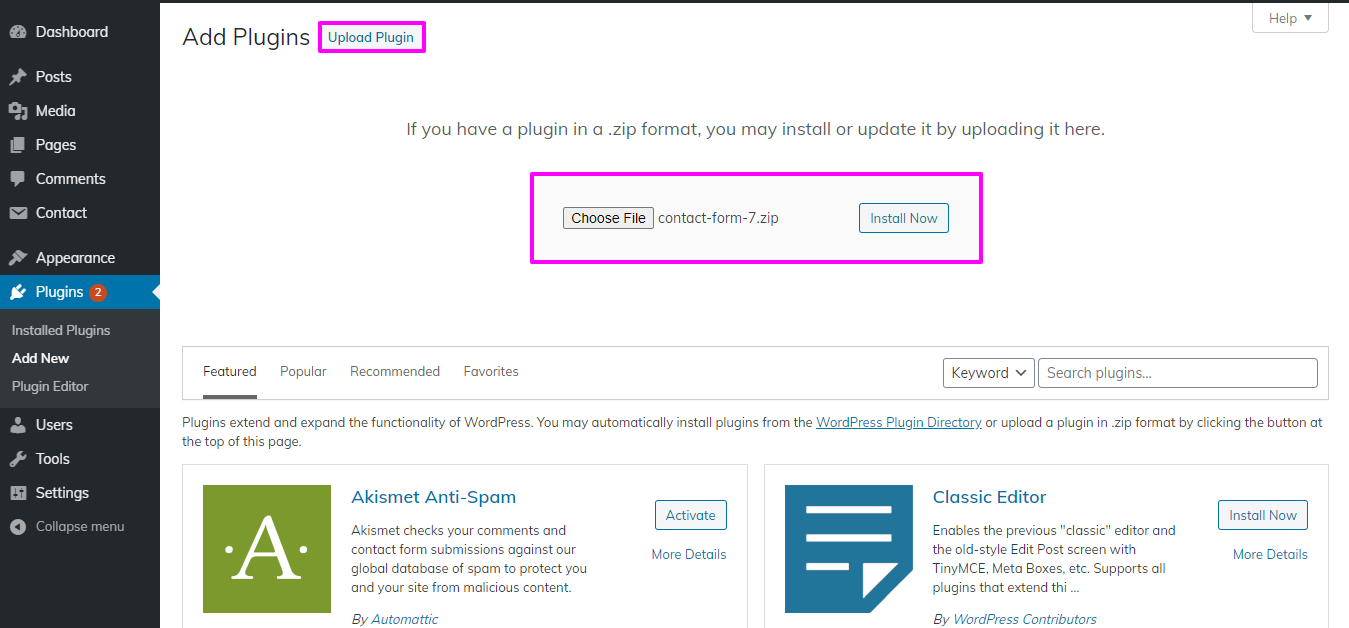
To Add a WordPress Plugin manually by .zip archive Follow these instructions to upload a plugin
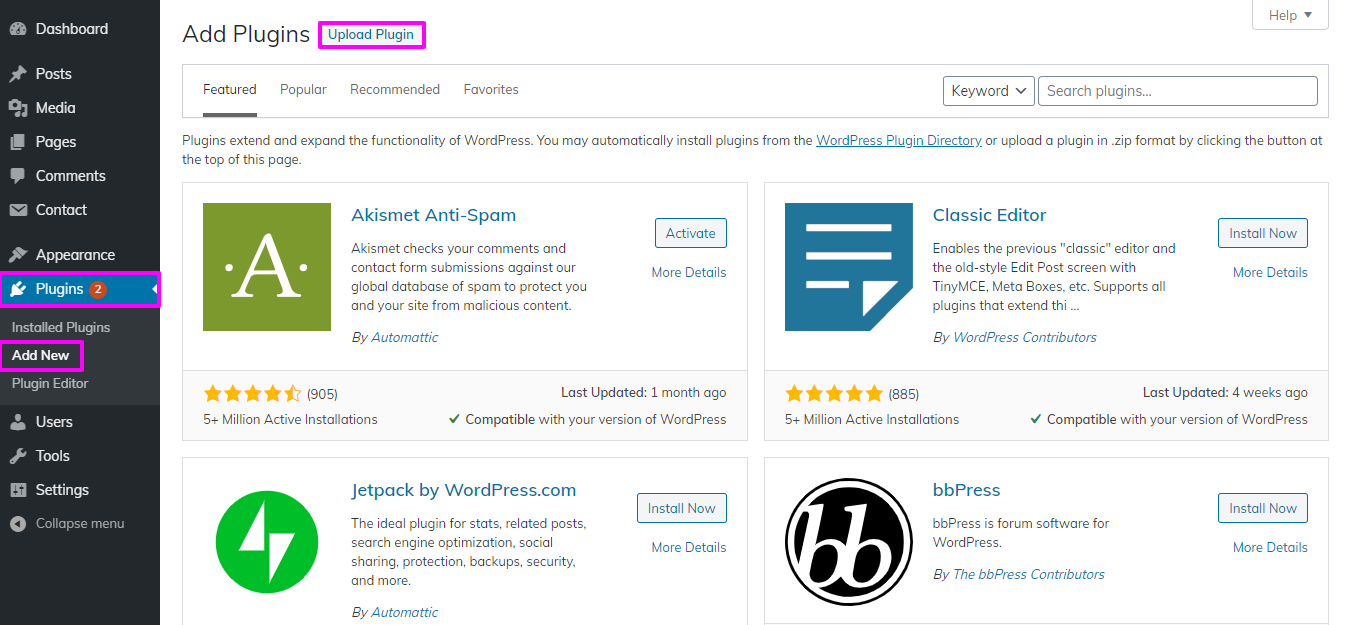
Select the "Install Now" button and activate
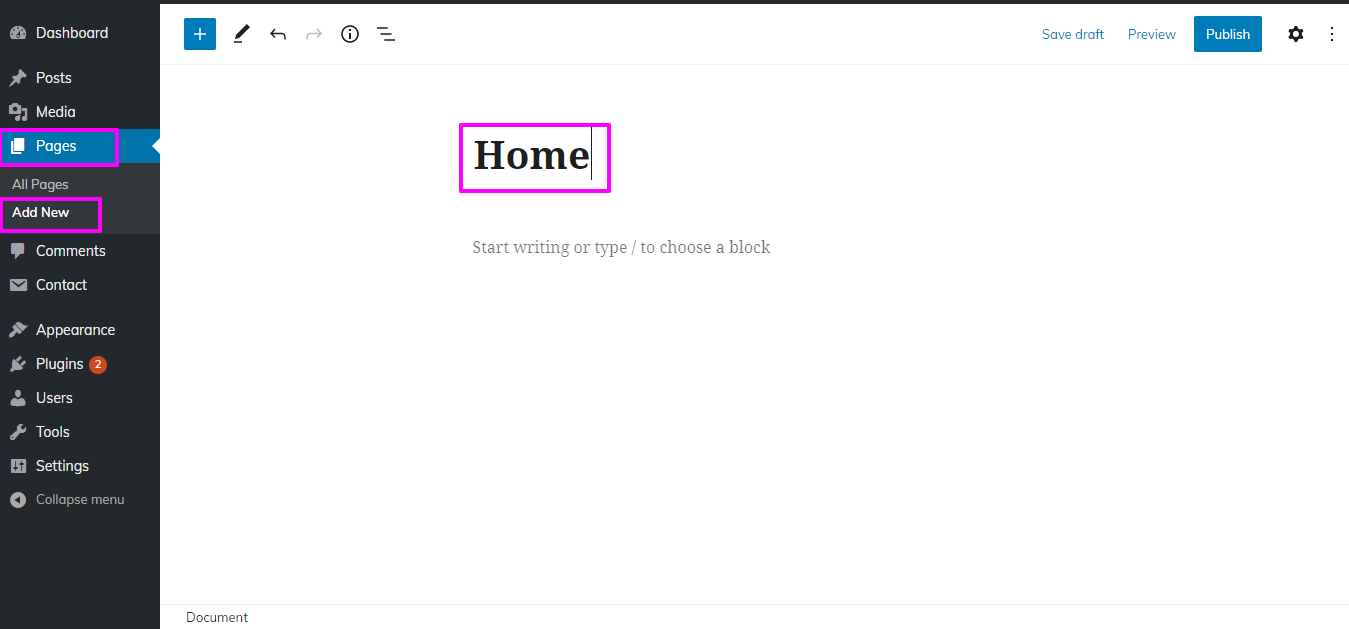
1) Now To set up home Page First Create a Page From Admin Area
Lable your page with your parent site name Alternatively name it home page also. Then Now Go forsettings then Reading and change the template from static to Main pageMain.
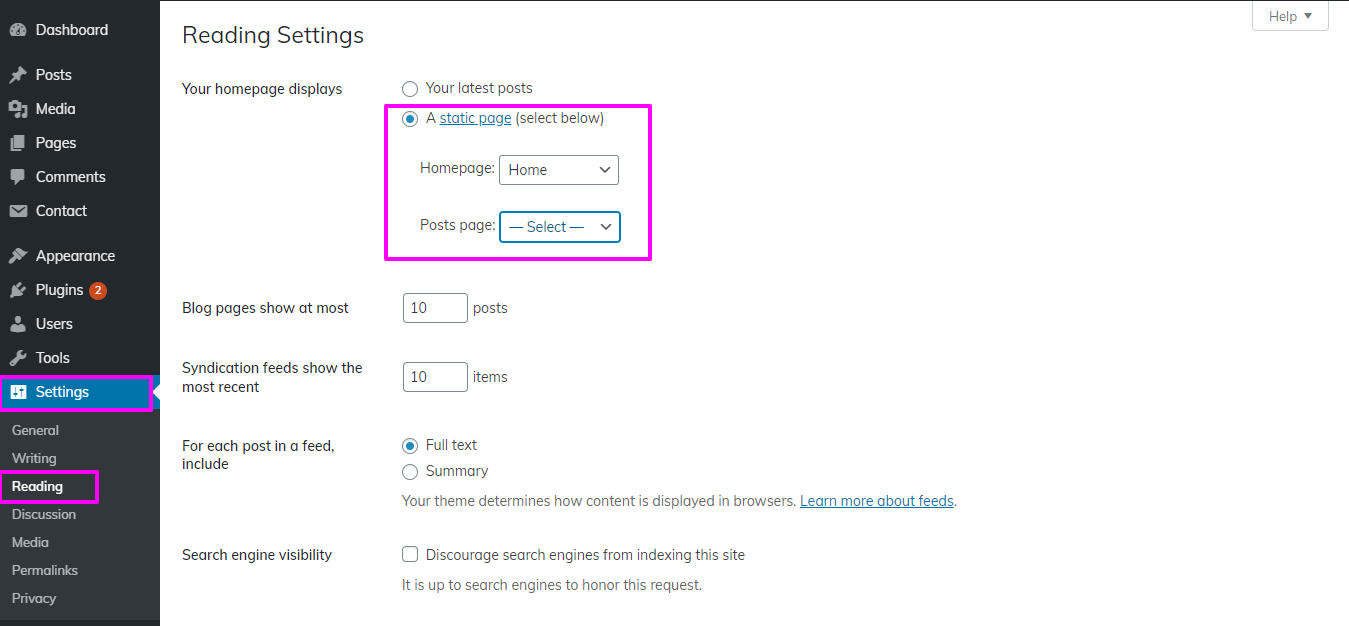
2) Instructions for setting the front page display as a static page: Now Go forthe WordPress dashboard and click on "Settings" in the left-hand menu. Select "Reading" from the submenu. Under the "Front page displays" section, choose the "Static Page" option. From the drop-down menu next to "Front page," select the "Home" page you created. Save your changes.
You will notice the Home Page looks same as screenshot..
Proceed with "Site-Identity",,
Now go For Appearance then After this Custumize then naviagate to themes; Site Identity
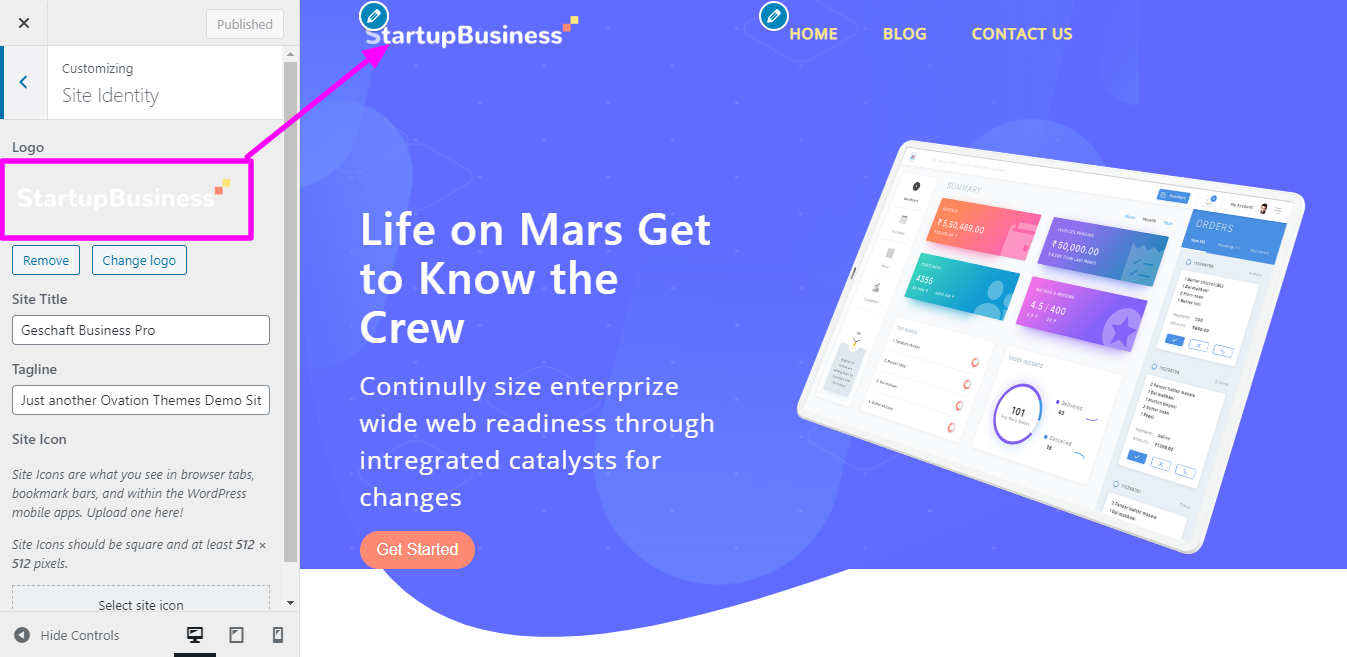
proceed with header,
Now go for Select Pages → then Click "Add New"
To add pages to the menu, you can follow these steps.
Now go for Appearance → then naviagate to menu → Click Add New
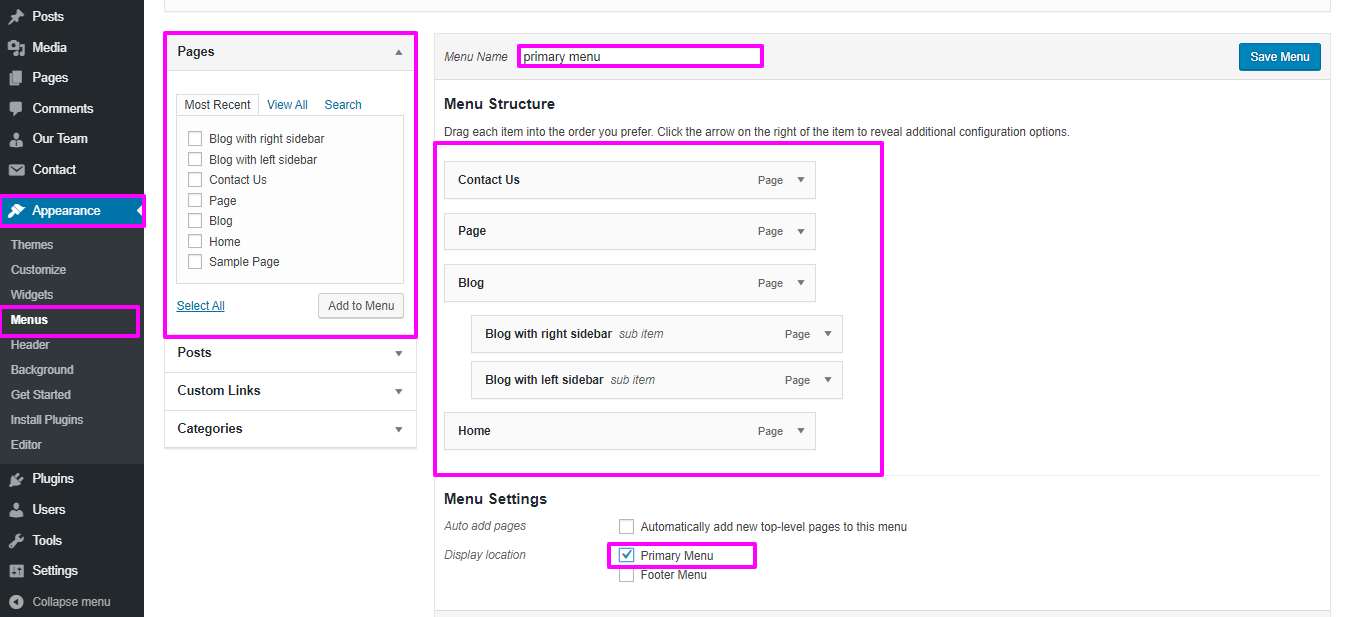
Repeat the same steps if you want To include additional pages to the menubar.
In this way By following these steps, you can easily Incorporate the menu section.

Proceed with banner
Now go for Appearance then After this Custumize then naviagate to themes; Banner Option → Banner
Front-end design will display like this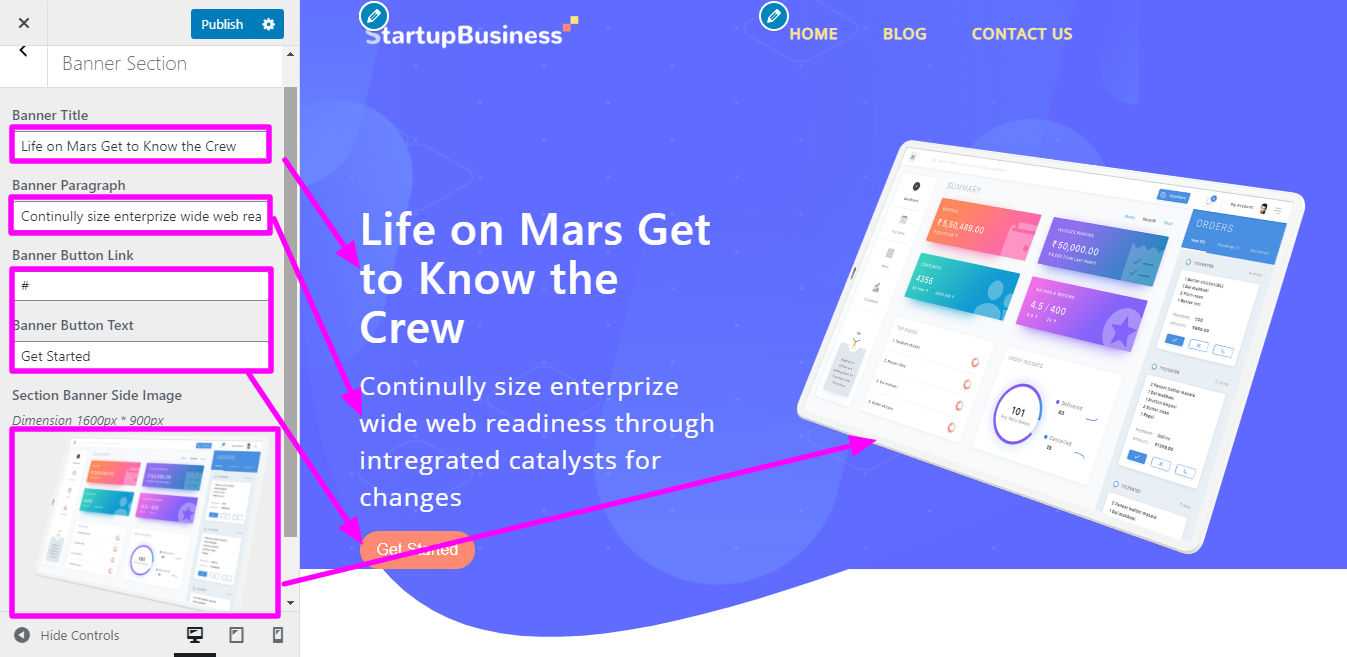

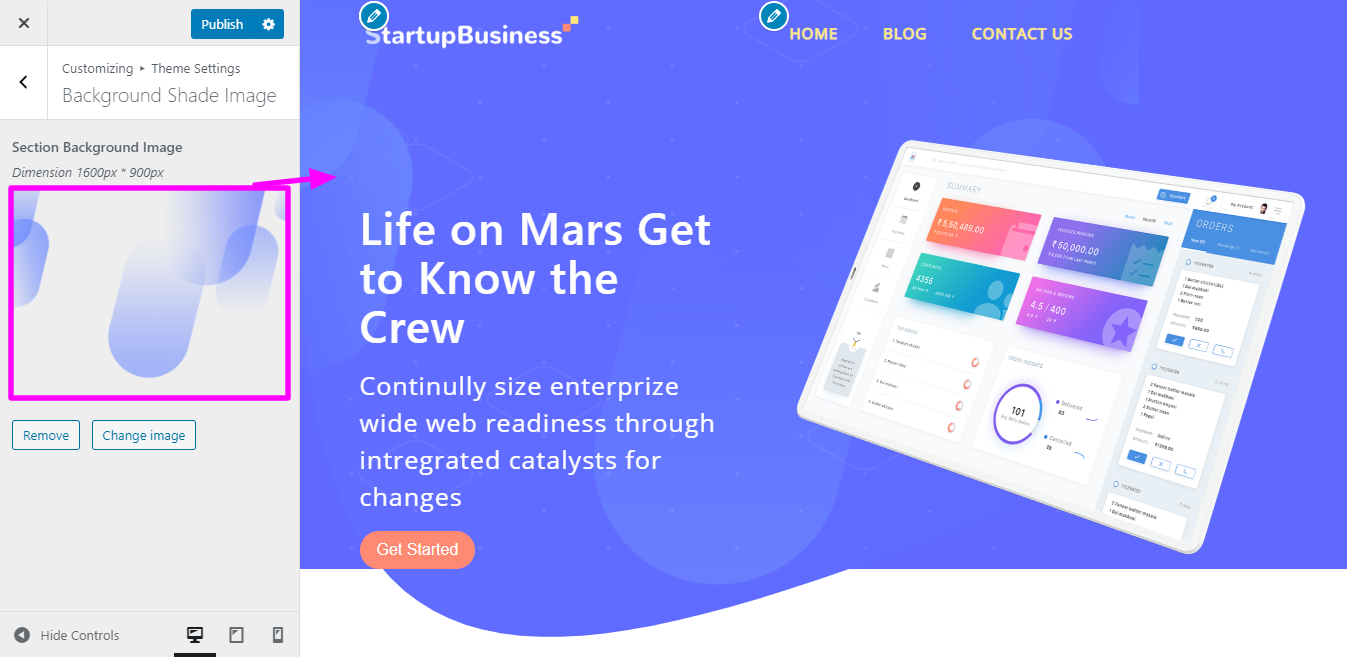
Proceed with Background Shade Image Section.
Now go for Appearance then After this Custumize then naviagate to themes; Background Shade Image Option → Background Shade Image Settings
Proceed with Client us Section
Now go for Appearance then After this Custumize then naviagate to themes; Client us Option → Client us Settings
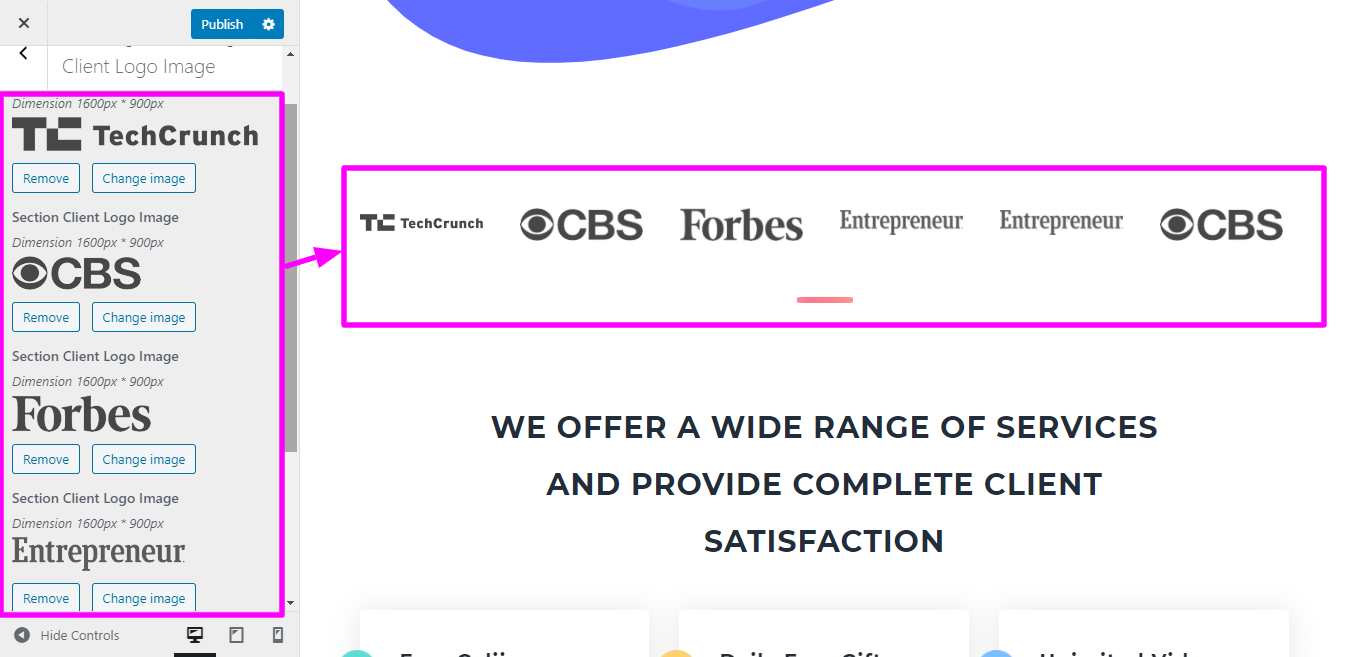
Front-end design will display like this

Proceed with What We Do Section
Now go for Appearance then After this Custumize then naviagate to themes; What We Do Option → What We Do Settings
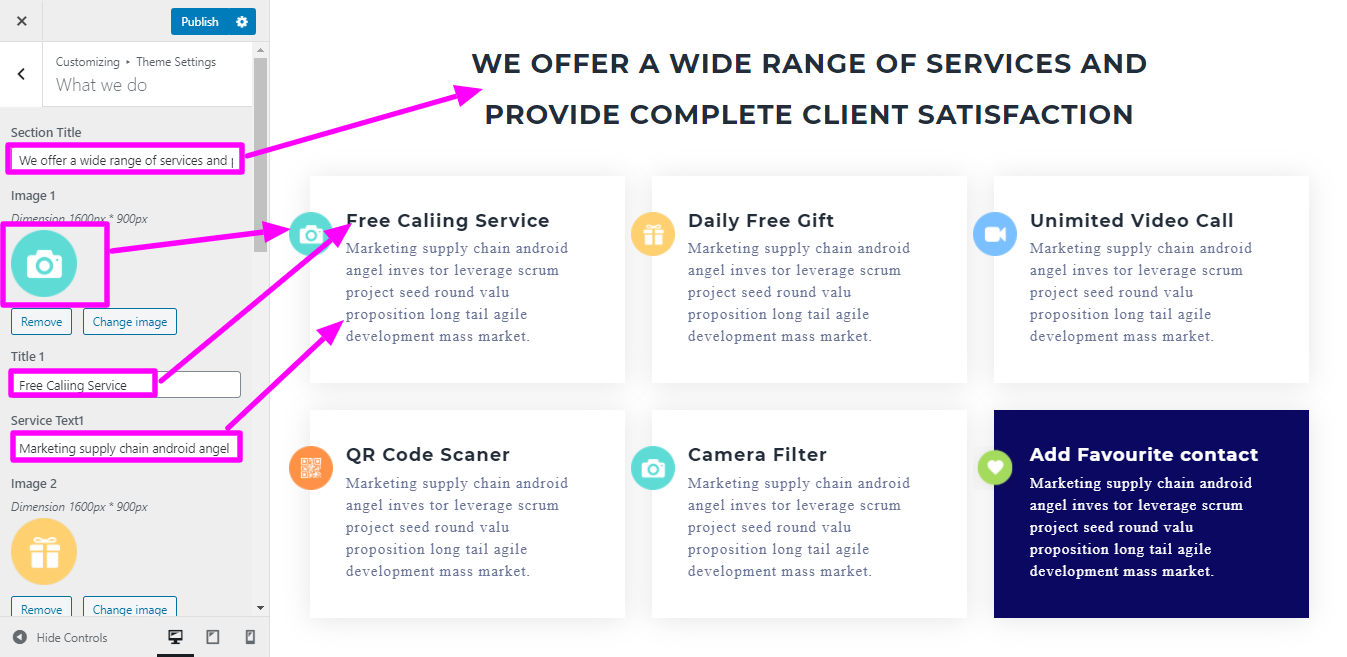
Front-end design will display like this

Proceed with About us Section
Now go for Appearance then After this Custumize then naviagate to themes; About us Option → About us Settings

Front-end design will display like this

Proceed with Integration us Section
Now go for Appearance then After this Custumize then naviagate to themes; Integration us Option → Integration us Settings

Front-end design will display like this

Proceed with Information us Section
Now go for Appearance then After this Custumize then naviagate to themes; Information us Option → Information us Settings
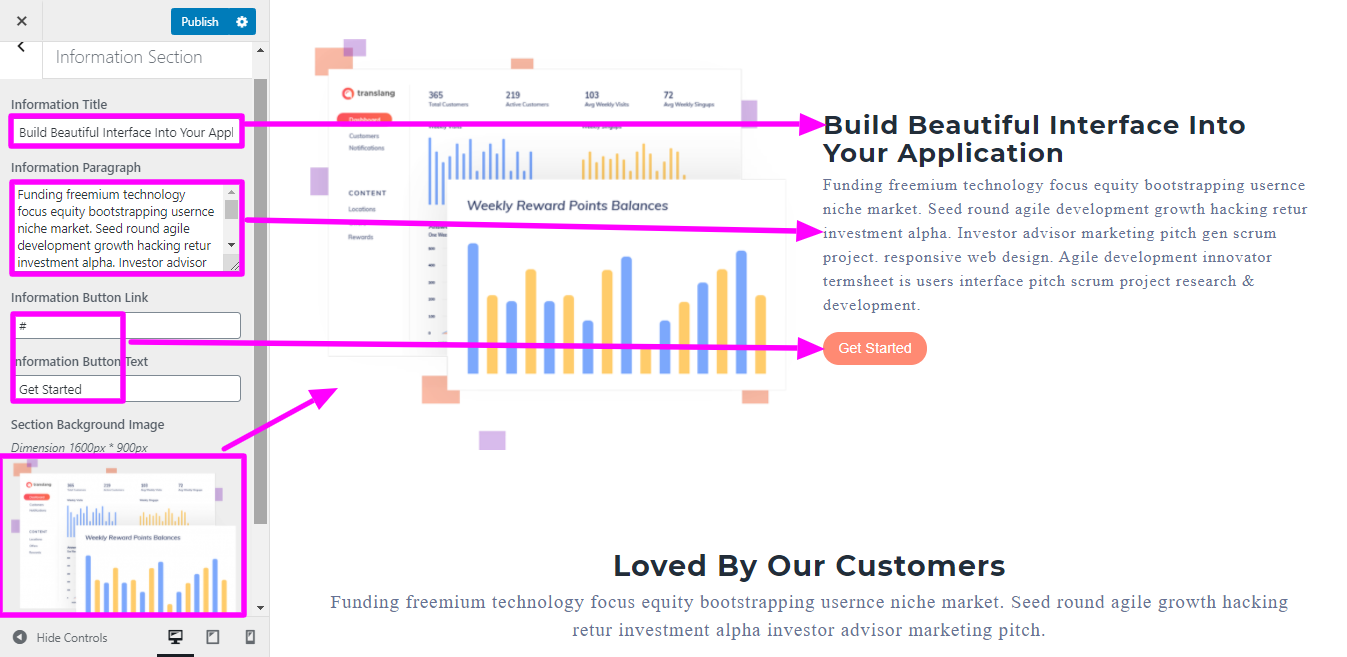
Front-end design will display like this

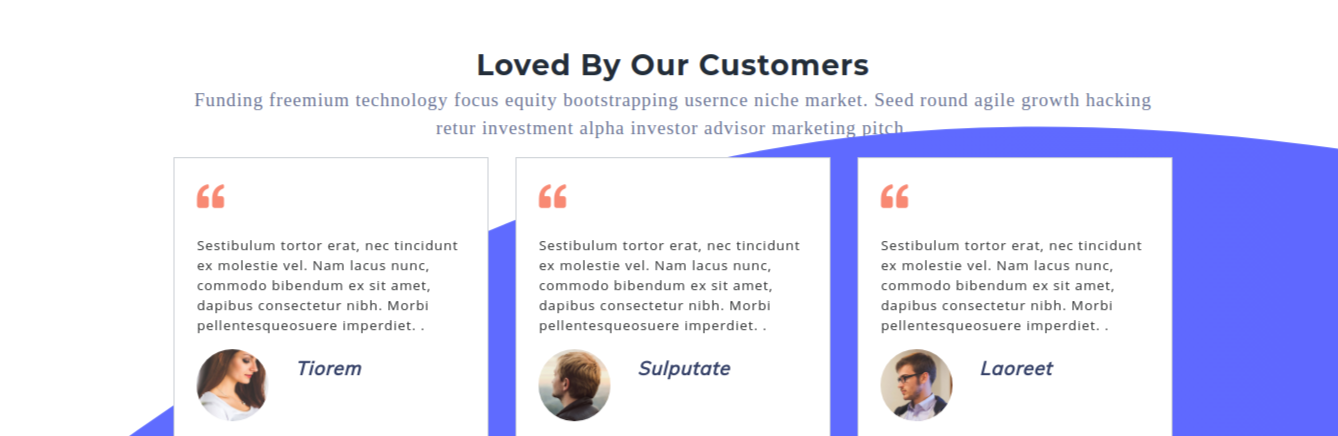
proceed with Testimonial Section
Now go for Appearance then After this Custumize then naviagate to themes; Testimonial Option → Testimonial Settings

Front-end design will display like this
Proceed with Footer,
Step 1.Now Go for Dashboard → then Appearance → then Now go on to Widgets
For designing this section, Now Go forwidgets of appearance section and select four footer columns for tags, gallery, contact and logo image respectively.
Refer to the image situated below for a better understanding of section widgets
Now go for then Dashboard → then Appearance → then Widgets → Click Add New
Front-end design will display like this

proceed with Footer-Text-section,
Now go for Appearance then After this Custumize then naviagate to themes; Footer Option → Footer-Text
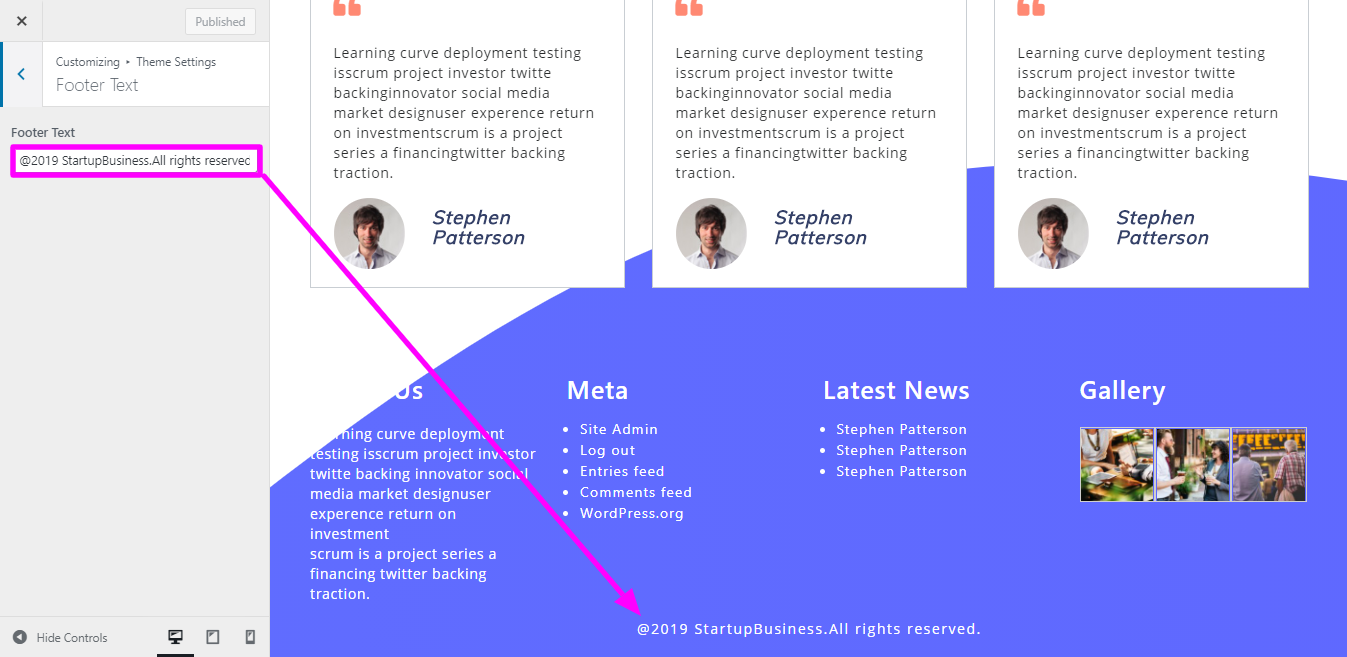
Front-end design will display like this

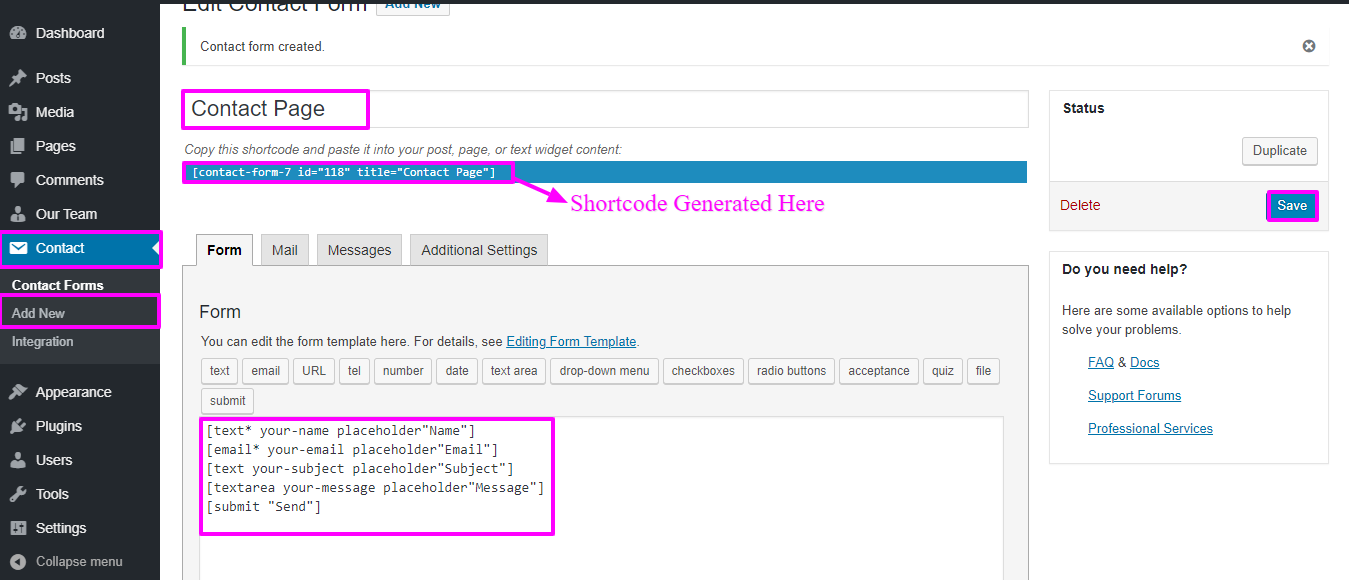
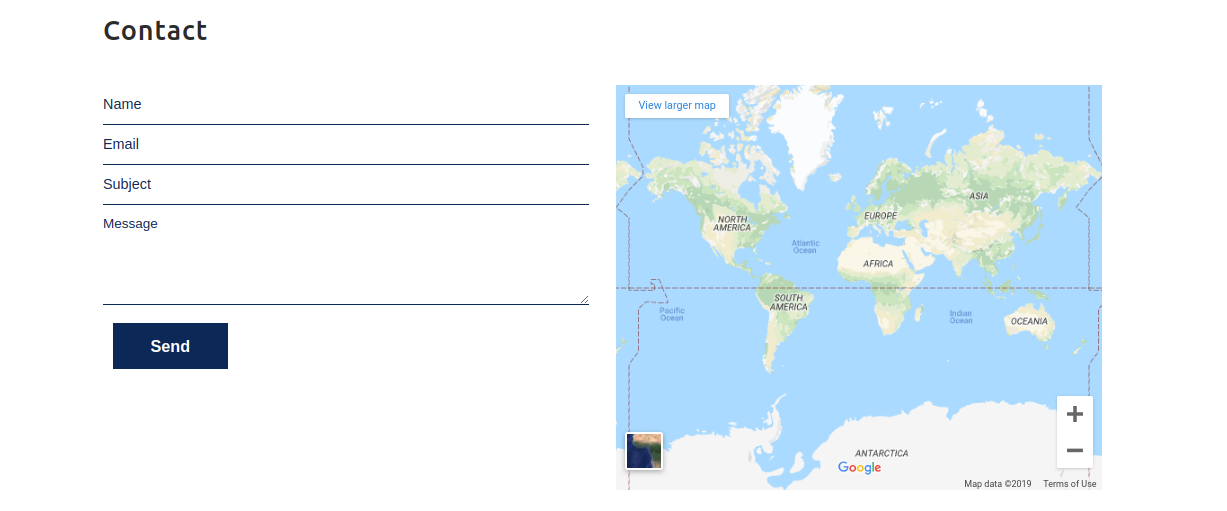
Before proceeding with the Contact Us section, It is necessary set-up for contact-form-7 plugin. Following the installation of contact-form-7 plugin. Contact options become visible on the Dashboard.
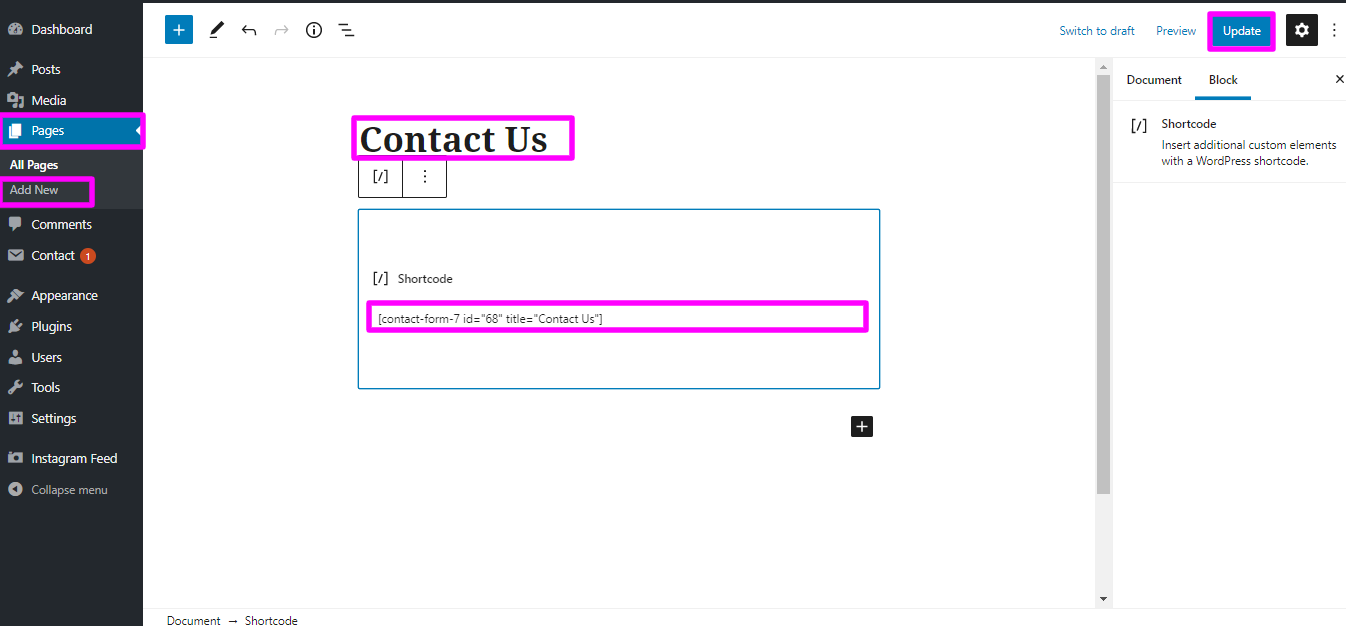
Now go for Dashboard → then Now go on toContact → select Click Add New Page
Now go for Appearance then naviagate to themes; then Now go on to Contact & Map Option → Contact & Map Settings
Now go for Appearance then naviagate to Theme setting -- then Select Contact
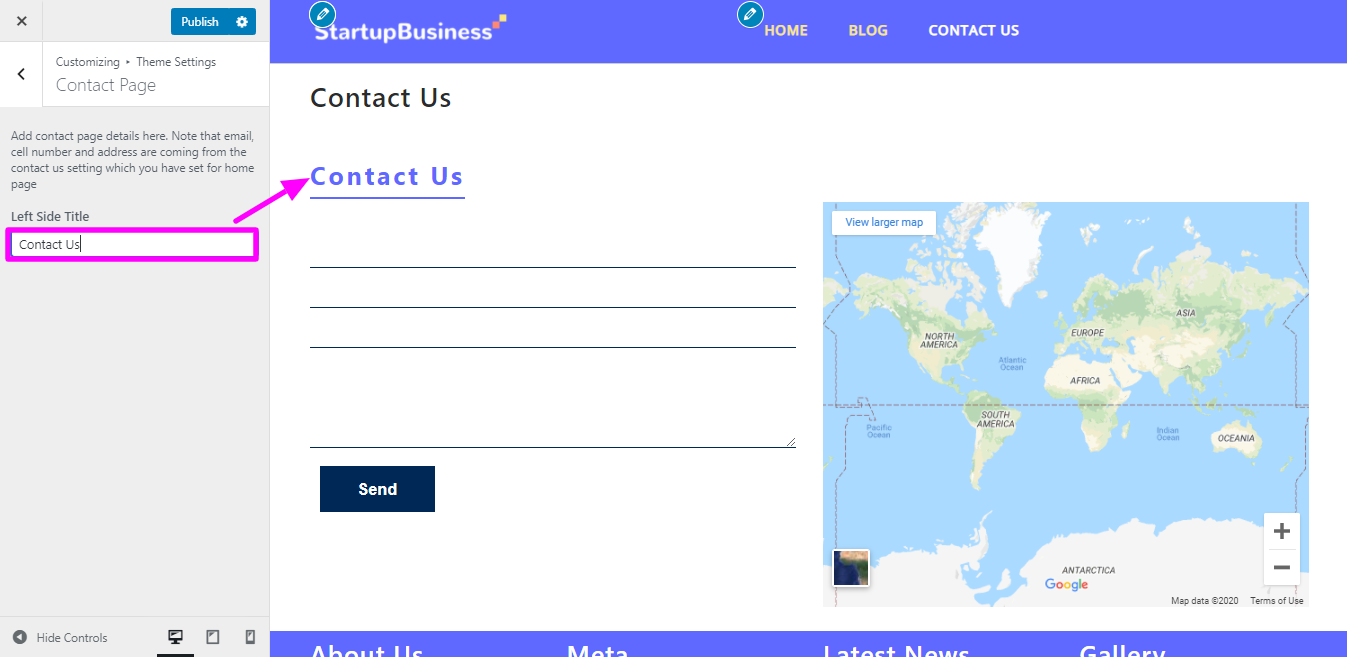
Front-end design will display like this
You can checkout the screenshots you will understand it better.