


Have you ever dreamed of sharing your thoughts, passions, or expertise with the world but held back because of cost? Good news: starting a blog doesn’t have to cost a thing. Whether you're a student, hobbyist, aspiring writer, or small business owner, you can launch a beautiful, functional blog website completely free. Many aspiring bloggers believe that setting up an online presence requires technical wizardry, expensive hosting, or a hefty budget. But what if we told you that empowering your unique voice and brilliant ideas doesn't have to cost a single rupee?
In this guide, we’ll show you exactly how to create a blog website for free. You don’t need to be a tech expert or invest in expensive tools. With free platforms like WordPress and others, turning your ideas into a live blog is easier than ever. A WordPress bundle offers multiple premium themes and plugins in one package, giving you everything you need to build professional websites at a great value.
Let’s dive in and unlock the power of free blogging where your voice matters more than your budget.
The Need to Create a Blog Website for Free
Creating a blog website for free is the perfect starting point for anyone who wants to share their ideas, build a personal brand, or explore online content creation without the pressure of upfront costs. Here’s why it makes sense:
- Zero Investment, Low Risk: Starting for free means you can test your ideas and blogging style without financial risk. If you're unsure whether blogging is right for you, a free platform allows you to experiment before committing.
- Perfect for Beginners: Beginner-friendly platforms like WordPress.com, Blogger, and Medium offer intuitive interfaces that simplify the blogging experience. No need to worry about buying hosting or learning to code sign up and start writing.
- Test Before You Scale: A free blog is a great way to test your niche, audience, and content strategy. Once you gain confidence and traffic, you can always upgrade to a paid plan or custom domain later.
- Build a Portfolio or Resume: Writers, designers, and marketers often use blogs as a professional portfolio. A free blog gives you a platform to showcase your work, opinions, or projects to potential employers or clients.
- Reach a Global Audience: Even a free blog can be indexed by search engines like Google. In other words, you can share your voice with a global audience without spending a single penny.
- Learn the Basics of Web & Content Management: Running a blog teaches you how to manage a website, structure content, use SEO, and understand basic web tools all valuable digital skills.
A Complete set of steps to create a Blog website for free
Creating a blog website for free in WordPress is very doable! Use this easy-to-follow roadmap to launch your blog:
Step 1: Decide the Blog Purpose
Before learning how to create a free blog website, it is essential to determine its purpose. Knowing why you’re blogging helps guide your content, tone, design, and long-term strategy. Blogging for free is more popular than ever here’s why:
- Personal Expression: Share your thoughts, life experiences, or creative writing with the world. A personal blog can serve as your digital journal or storytelling platform.
- Learning & Experimentation: Use blogging as a way to learn digital tools, improve your writing, and test different content formats without financial commitment.
- Educational or Informational Content: Create tutorials, how-tos, or informative posts on topics you're passionate about or knowledgeable in (e.g., tech, cooking, travel, health).
- Build a Portfolio or Resume: Writers, designers, photographers, and students often use free blogs to showcase their skills or projects to future employers or clients.
- Build a Community or Support Group: Whether it’s parenting, mental health, or hobbies, blogs can unite like-minded people and create meaningful conversations.
- Promote a Cause or Idea: If you care deeply about a social issue, environmental cause, or movement, a blog can help you spread awareness and influence.
Step 2: Choose a Free Web Host and a Domain

Choosing a truly "free web host" to create a blog website for free, especially if you're thinking of a self-hosted WordPress.org site, comes with significant caveats. While the WordPress software is free, running it on a server usually incurs costs. Using the best WordPress blog themes for personal blog websites can help you create a unique, engaging, and professional-looking space to share your thoughts and stories online.
Here's how to pick the best one for your needs:
- Beginner? Choose a platform like WordPress.com, Blogger, or Medium they're easy to set up and manage without coding.
- If you are an intermediate or an advanced designer, platforms like 000Webhost, InfinityFree, or GitHub Pages offer more control but may require some technical knowledge.
- Make sure the free host provides: free subdomain, basic themes, content editor, and access to blogging tools like categories, tags, and comments.
- Free web hosting often comes with restrictions. You must compare the storage space, bandwidth limits, ads, custom domain options, plugins, and SEO options.
- Choose a platform with: an active user community or help forum, support documentation, or tutorials, and optional upgrade paths for when your blog grows.
- For blogging, the most sensible "free web host" choice is typically a managed platform like WordPress.com (Free Plan), Wix, or Weebly, as they handle the complexities and provide a more stable environment for a free blog. If you opt for a traditional free web host to install WordPress.org, be prepared for significant compromises in performance, features, and reliability.
Step 3: Install WordPress

To create a blog website for free, here’s the next step: get a free hosting plan from WordPress. Getting started with the WordPress.com free hosting plan, go to WordPress.com: Visit the official website.
Click "Get Started" or "Start your website."
Choose a plan: You'll be presented with various paid plans, but look for the option to "Start with a free site" or similar. It might be less prominent.
Choose your domain name: With a free plan, you'll receive a subdomain.
Follow the setup wizard: WordPress.com will guide you through setting up your site title, theme, and basic information.
Start creating content: Once set up, you can access your WordPress dashboard and start creating posts and pages.
Step 4: Choose a Blog Theme
The next step to create a blog website for free is to choose a suitable blog theme that stands out. When you have the WordPress hosting plan and have successfully installed it, now is the time to get it personalised. This is when the WordPress Themes come to play.
Choosing a "perfect" free WordPress blog theme requires balancing your aesthetic preferences with crucial functional aspects. While free themes have limitations compared to premium ones, many excellent options can help you create a professional-looking blog.
Here's a clear step-by-step guide to help you pick the right one for free:
- Your blog must look good and function flawlessly on all devices, so the theme must be responsive and mobile-friendly.
- Look for themes explicitly stating they are fast, lightweight, or optimised for performance. Avoid themes with excessive animations, sliders, or heavy graphics in their demos if they don't seem to load quickly.
- Ensure the theme fully supports the customisation so your content looks exactly as you designed it.
- Look for themes with an SEO-friendly structure that take your website to good search engine ranks.
- Themes with plugin compatibility are highly preferred by users as they don’t need to look for additional functionality. And most WordPress Themes have plugin compatibility.
- Look for themes with regular updates and customer support that help users easily look for the support team when needed.
- If your blog relies on images, ensure the theme displays featured images prominently and aesthetically.
Where to find the best free WordPress Themes?
The most trusted source for free WordPress themes is the official directory at WordPress.org. Themes here undergo a rigorous review process, ensuring they meet WordPress coding standards, are secure, and are generally well-maintained.
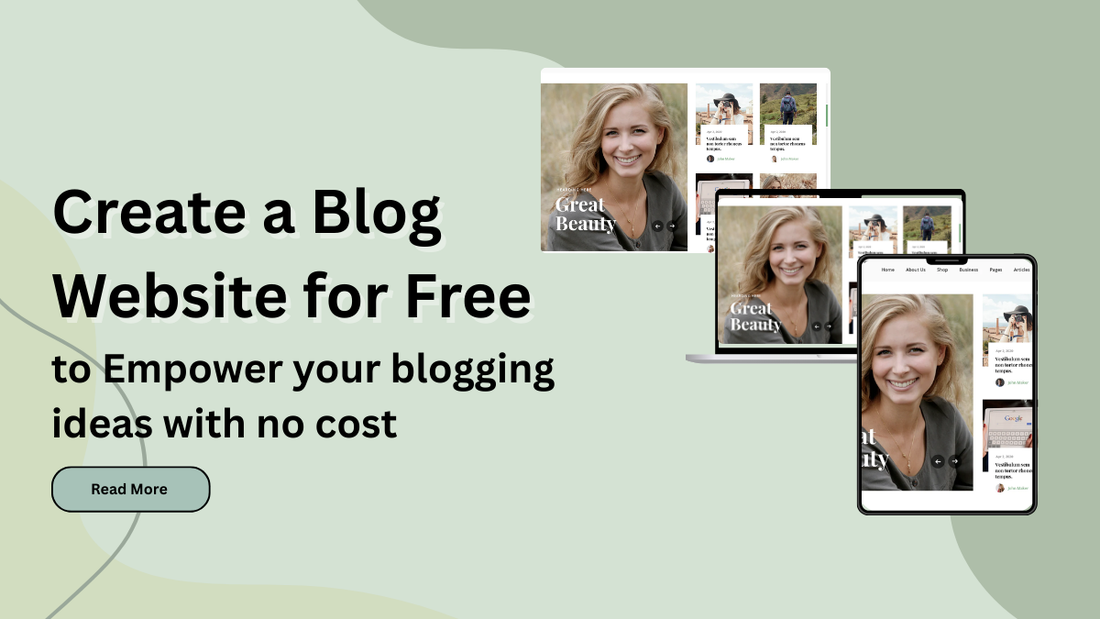
Out of thousands of WordPress Themes available on the directory, you can go for the Ovation themes, which offer clean, optimised, and highly-functional themes to access. Of those, the “Ovation Blog” theme is highly recommended and most used by beginners and even experienced ones. Let’s hear about the Ovation Blog theme to create a blog website for free.
Ovation Blog WordPress Theme

Ovation Blog is a free WordPress theme you can download directly from the official WordPress.org theme repository. It's designed specifically for bloggers, with a strong emphasis on content display and ease of use.
Ovation Blog is tailored for individuals and entities who want to share content online, whether it's travel adventures, personal journals, food blogs, lifestyle, art, music, or news. It aims to provide an immersive and visually appealing experience, often leveraging full-screen layouts and stunning gallery options, especially useful for travel or photography-heavy blogs. The theme ensures your blog looks great and functions well on all devices, from mobile phones to high-resolution desktop screens. With its full-screen design, it delivers a sleek and immersive browsing experience for your readers. It has stunning gallery options beneficial for showcasing images, which is great for travel, photography, or art blogs.
The theme is designed to be user-friendly, allowing you to set up and customise your site without needing coding skills. All edits are made effortlessly using the live preview features of the WordPress Customizer. While primarily for blogs, it's described as suitable for various types of websites due to its flexibility. Its optimised coding helps improve your blog’s chances of ranking higher on search engines. It is prepared for translation into multiple languages, allowing you to reach a global audience. It supports the WordPress Block Editor (Gutenberg), ensuring your content is displayed correctly as you create it using blocks. best blog templates for WordPress provide clean layouts, customizable designs, and user-friendly features to help you share content effectively.
How to Install the “Ovation Blog” WordPress Theme?

- To get the Ovation Blog theme on your blog website, go to yourdomain.com/wp-admin and enter your username and password.
- On the left-hand sidebar, hover over Appearance and click on Themes.
- On the Themes page, you'll see a button that says Add New at the top. Click on it.
- Search for ‘Ovation Blog’ using the bar on the right and press Enter.
- The Ovation Blog theme should appear in the search results. Hover your mouse over the theme, and you'll see options to "Details & Preview" or "Install." Click the Install button.
- Once installation is complete, the button will update to 'Activate.' Select it to enable Ovation Blog as your site’s theme.
- That's it! Your website will now be using the Ovation Blog theme.
Once the Ovation Blog theme is activated, you can start customising it to fit your blog's needs:
- Go to Appearance > Customise. This will open the WordPress Customizer, where you can modify various aspects of your theme in real-time, such as site title, logo, colours, typography, header and footer options, and blog layout.
- Check Theme Options (if any): Some themes have their own dedicated "Theme Options" panel under Appearance, but most modern themes rely heavily on the Customizer.
- Customise Your Homepage and Blog Page: To display a static homepage with a separate blog section, navigate to Settings > Reading and adjust the "Your homepage displays" settings accordingly.
- Build Your Navigation Menu: Head over to Appearance > Menus to create and assign custom menus that guide visitors through your site.
- Enhance with Widgets: Go to Appearance > Widgets to populate your sidebar and footer areas with useful content like recent posts, search bars, social links, and more.
Step 5: Set up Essential Pages
To set up important pages for your free blog website in WordPress, you'll primarily use the WordPress dashboard. These pages are crucial for providing information to your readers, complying with legal requirements, and organizing your content.
Here are the essential pages you should consider creating for your blog: the blog page, contact page, privacy policy page, and terms and conditions page. Adding a contact form on WordPress makes it easy for visitors to reach out, improving communication and lead generation for your website.
Ready to craft a new page for your blog? Here's how to do it:
- Access your WordPress admin panel, go to 'Pages,' and click on 'Add New' to begin creating a page.
- Give it a title like "Blog," "Articles," or "News."
- Leave the content area empty. You don't add your posts directly here; WordPress will automatically populate them.
- Click Publish.
- Once created, it is important to assign it as the post page. To do this, simply head to Settings > Reading.
- Find the 'Your homepage displays' section and set it to 'A static page' to define a fixed homepage.
- From the 'Posts page' menu, just pick the page you made a moment ago.
- Click Save Changes.
Now, all your future blog posts will automatically appear on this designated "Blog" page.
Similarly, you can build more pages for your blog website.
Step 6: Write your first Blog Post
You've set up your WordPress site and key pages, now it's time for the most exciting part: writing your very first blog post! This initial post serves as an introduction to your blog, your voice, and the content your readers can expect.
Here's a step-by-step guide to writing and publishing your first blog post on your free WordPress website:
Before you start typing, consider these points:
- What's the purpose? Is it an introduction to your niche, a personal welcome, or your very first piece of content on a specific topic?
- Keep it short and sweet: Your first post doesn't need to be a magnum opus. Aim for 300-600 words to start.
- Be authentic: Let your personality shine through.
- Call to action: Encourage readers to leave a comment, subscribe, or check out your About page.
Steps to write your first blog
- Log in to your WordPress Dashboard: Go to yourdomain.com/wp-admin.
- On your left-hand sidebar, simply hover over Posts and then click Add New.
- This will open the WordPress Block Editor.
- The Block Editor allows you to add different types of content in "blocks."
- Title: At the top, you'll see a field that says "Add title." Type your catchy post title here.
- Paragraphs: Click inside the main content area. You'll see a blinking cursor and often a "Type / to choose a block" prompt. Start typing your post content.
- Each time you press Enter, WordPress automatically creates a new Paragraph block.
- Use headings to divide your content and make it easier for readers to skim. Click the + icon or type /heading and select the Heading block.
- Choose the appropriate heading level. H1 is reserved for your post title.
- To add an image, click the + button or type /image, then choose the Image block.
- Next, you can upload an image from your device, pick one from your media library, or insert it using a URL.
- Always add Alt Text to your images for accessibility and SEO.
- On the right-hand side of the editor, you'll see a sidebar with "Post" and "Block" tabs. Ensure that the 'Post' tab is active.
- Visibility: "Public" (default, good for live), "Private" (only logged-in admins/editors can see), or "Password Protected."
- Publish: Set a future date/time if you want to schedule the post.
- Permalinks: This is your post's URL. WordPress usually generates a good one based on your title. You can edit it if needed. Keep it short, descriptive, and include keywords if possible.
- Categories: Click "Add New Category" to create relevant categories for your post. Assign your post to one or more.
- Tags: Add relevant keywords or phrases as tags.
- Featured Image: This is the main image that represents your post on your blog page, social media shares, and sometimes within the post itself. Tap 'Set featured image,' pick or upload your visual, then click the button again to lock it in.
- Allow Comments: Check this box if you want readers to be able to leave comments.
- In the upper right corner of your editor, click the Preview button. You can choose to preview on Desktop, Tablet, or Mobile, and open in a new tab.
- When everything looks good, go ahead and click 'Publish.
Step 7: Install Useful Plugins
To create a blog website for free with WordPress, there are several essential plugins you should install to improve performance, security, SEO, and usability. Check out this selection of essential free plugins for your blog. WordPress SEO best practices helps improve your website’s rankings, drive more organic traffic, and enhance overall online visibility.
- Yoast SEO or Rank Math: These are paramount for helping your blog rank higher in search engine results. They offer features like meta title and description templates, content analysis for keywords, XML sitemap generation, and readability checks.
- Akismet Anti-Spam: Essential for combating spam comments, which can quickly overwhelm a blog's comment section.
- Wordfence or All In One WP Security & Firewall: These plugins provide crucial security measures, protecting your site from malware, brute-force attacks, and other vulnerabilities.
- WP Super Cache or W3 Total Cache: Caching plugins are vital for improving your blog's loading speed by generating static HTML files of your dynamic content. Faster loading times enhance user experience and SEO.
- UpdraftPlus: This plugin allows you to easily back up your entire website and restore it if needed, providing peace of mind against data loss.
- WPForms Lite: The easiest way to create contact forms, surveys, and other types of forms to interact with your audience.
- Easy Social Sharing or Shared Counts: Adds social media sharing buttons to your blog posts, making it easy for readers to share your content.
- Pretty Links: Helps you manage and shorten links, especially useful for affiliate links, and can track clicks.
- Blog Designer: Offers various templates and customisation options to enhance the visual appearance of your blog posts and archive pages.
How to Install a WordPress Plugin?
- To install a WordPress, head to the WordPress dashboard and choose the Plugins option.
- Under the plugins option, tap the “Add New” option and this will help you reach the WordPress plugin directory.
- In the search panel, search for the required plugin and enter.
- Once found, tap the Install button and then the activate button. You will then see the plugin appears under the dashboard area.
Step 8: Test and Launch your website

You’ve now explored the full process of building a blog website at no cost. You need to now test and finally launch your website. Here's a comprehensive guide on how to test and launch your blog website:
- Before your blog goes live to the world, rigorous testing is crucial. This helps you catch errors, improve user experience, and ensure everything functions as intended.
- Click every link within your posts, pages, menus, sidebar widgets, and footer to ensure they lead to the correct destination.
- Click each social sharing button on a post to ensure it correctly populates with your post's title, URL, and featured image on the respective social media platform.
- Check dropdown menus (if any) to ensure they expand and function properly.
- Read every single post and page for typos, grammatical errors, punctuation mistakes, and awkward phrasing.
- Ensure all images are loading correctly, are appropriately sized, and don't appear pixelated or stretched.
- Check headings, paragraph spacing, bullet points, numbered lists, and blockquotes for consistent styling across all posts and pages.
- Use your phone, tablet, and resize your desktop browser window to check how your blog looks and functions on various screen sizes.
- Use tools like Google PageSpeed Insights, GTmetrix, or Pingdom Tools to analyse your site's loading speed.
Once you're confident your blog is polished and error-free, it's time for the launch!
Conclusion
To create a blog website for free is a fantastic way to dip your toes into the world of content creation, share your passions, and build an online presence without any initial financial investment. It provides an accessible entry point for aspiring bloggers, hobbyists, and even small businesses looking to establish a digital footprint.
It allows you to focus on content creation and audience building without the initial financial burden. By strategically utilising free platforms and essential free plugins, you can establish a functional and appealing online presence.
However, for those serious about professional blogging, long-term growth, full control, and robust monetisation, a gradual transition to a self-hosted WordPress site with a custom domain and potentially premium plugins or hosting is often the necessary next step. The "free" journey is a valuable foundation, but it's important to understand its constraints as your blogging aspirations evolve. Choosing professional WordPress themes ensures your website looks polished, loads fast, and provides advanced features tailored for businesses and creatives.