23 Apr
Introduction
An online store, also known as an e-commerce store, is a website where businesses or individuals sell their products or services over the internet. It allows customers to browse through a catalog of items, select the ones they want to purchase, add them to a virtual shopping cart, and complete the transaction electronically. Online stores typically offer various payment options, such as credit cards, digital wallets, or online payment gateways, and provide shipping or delivery options for the purchased items. They may also include features like customer reviews, product recommendations, and personalized shopping experiences to enhance the user’s online shopping journey.
Why Is it Necessary to Make Your Own Online Store?
Here are some reasons why it’s necessary to have your own online store:
- Control: With your own online store, you have full control over your brand, products, pricing, and customer experience. You can tailor every aspect of your store to align with your vision and business goals.
- Brand Identity: An online store allows you to showcase your brand’s unique identity and personality. You can design your store’s appearance, messaging, and customer interactions to reflect your brand values and connect with your target audience.
- Flexibility: Having your own online store gives you the flexibility to adapt and innovate according to market trends and customer preferences. You can easily introduce new products, promotions, or features without relying on third-party platforms.
- Customer Relationships: Direct ownership of your online store enables you to build and maintain direct relationships with your customers. You can collect customer data, gather feedback, and provide personalized experiences to enhance customer loyalty and satisfaction.
- Profitability: Running your own online store allows you to capture a larger share of the profits from each sale compared to selling through third-party marketplaces or platforms. You can set your own pricing strategies and maximize your margins.
- Scalability: As your business grows, having your own online store provides the scalability needed to accommodate increased traffic, sales volume, and product offerings. You can easily expand your store’s capabilities and reach new markets as opportunities arise.
- Data Ownership: By operating your own online store, you retain ownership of valuable customer data and insights. This data can inform your marketing strategies, product development efforts, and overall business decision-making.
- Long-Term Sustainability: Building your own online store establishes a sustainable foundation for your business’s long-term success. You’re less reliant on external platforms or marketplaces, reducing the risk of disruption or dependency on third-party policies.
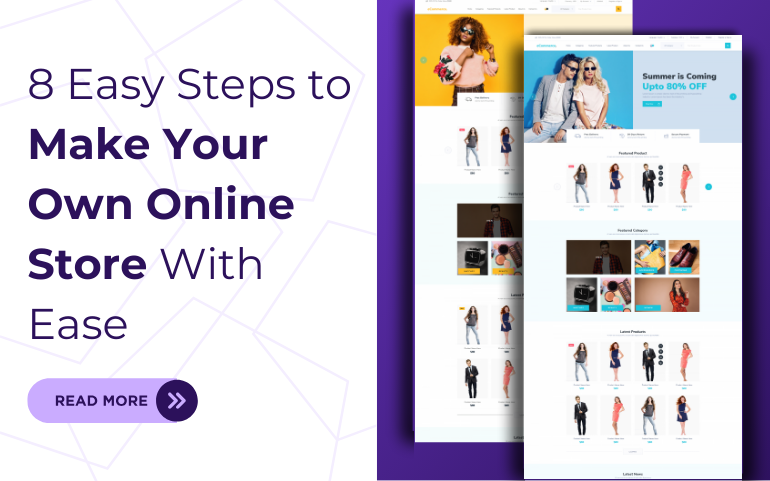
How to Make Your Own Online Store?
Creating your own online store is a rewarding venture that allows you to showcase your products or services to a global audience. With the rise of e-commerce platforms like Shopify, WooCommerce, and Magento, establishing an online store has become more accessible than ever. By selecting a platform, customizing your store’s design, adding products, configuring payment and shipping options, and promoting your store, you can launch a successful online business and reach customers worldwide. If you are willing to build an ecommerce store without investing, then you can go through our previous blog to build free ecommerce website. For initial stage, you can go for free website building; but for a long time run, you need advance functionality. So, for that reason you need to go for premium one.
Step 1: Choose Your niche and a suitable Brand Name
Choosing your niche and a suitable brand name is a critical step in establishing your online presence. Start by identifying your passions, expertise, and target audience’s needs. Additionally, conduct thorough market research to identify underserved segments within your industry and potential gaps you can fill. Define your target audience’s demographics, preferences, and pain points to tailor your niche and brand positioning effectively. Once you have a clear understanding of your niche, brainstorm brand name ideas that reflect your identity, values, and unique selling proposition. Consider factors like brand uniqueness, memorability, and domain availability when selecting a name. Test your chosen brand name with your target audience to ensure it resonates positively and aligns with your brand identity and vision.
Step 2 : Select Domain and Hosting
Purchasing a hosting plan and obtaining a domain name are essential steps to make your own online store. Start by selecting a reputable web hosting provider that offers reliable server infrastructure, sufficient storage space, bandwidth, and support for your website’s needs. Consider factors like uptime guarantees, scalability options, security features, and customer support availability. Once you’ve chosen a hosting plan, register a domain name that reflects your brand or website’s identity. Choose a domain registrar that provides domain management tools, competitive pricing, and excellent customer service. Also, ensure that the domain name is memorable, relevant to your niche, and easy to spell. By securing both hosting and a domain name, you lay the foundation for launching your website and reaching your target audience effectively.
Step 3: Installing WordPress
Installing WordPress is a straightforward process that can be done in a few simple steps. Here’s how to do it:
- Access cPanel: Log in to your hosting account and access the cPanel dashboard.
- Launch WordPress Installer: Look for an option called “WordPress Installer” or “Softaculous Apps Installer” in cPanel, and click on it to launch the WordPress installation wizard.
- Select Domain and Directory: Choose the domain name where you want to install WordPress. Leave the “In Directory” field blank if you want WordPress to be installed in the root directory (e.g., yourdomain.com).
- Enter Site Information: Fill in the site name, site description, admin username, admin password, and admin email address. These details will be used to log in to your WordPress dashboard.
- Complete Installation: Review the installation settings and click the “Install” button to begin the WordPress installation process. Wait for the installation to complete.
- Access WordPress Dashboard: Once the installation is finished, you’ll receive a confirmation message with a link to your WordPress dashboard. Click on the link to access your WordPress dashboard and start customizing your website.
Step 4 : Select a WordPress Theme
Choosing the perfect professional WordPress theme to make your own online store involves careful consideration of design, functionality, and user experience. Start by defining your brand identity and target audience, ensuring the theme aligns with your brand aesthetic and values. Look for a theme that offers customizable design elements, such as color schemes, typography, and layout options, allowing you to create a visually appealing and cohesive storefront. Furthermore, consider the theme’s compatibility with your chosen e-commerce platform, ensuring seamless integration and support for essential features like product listings, checkout process, and payment gateways. Evaluate the theme’s responsiveness across different devices, optimizing for mobile usability and accessibility. Additionally, assess the theme’s performance, loading speed, and SEO-friendliness to enhance your website’s visibility and user engagement. Also, by selecting a well-designed and feature-rich WordPress theme, you can create a professional and engaging online shopping experience that resonates with your customers and drives conversion.
a) Ecommerce WordPress Theme
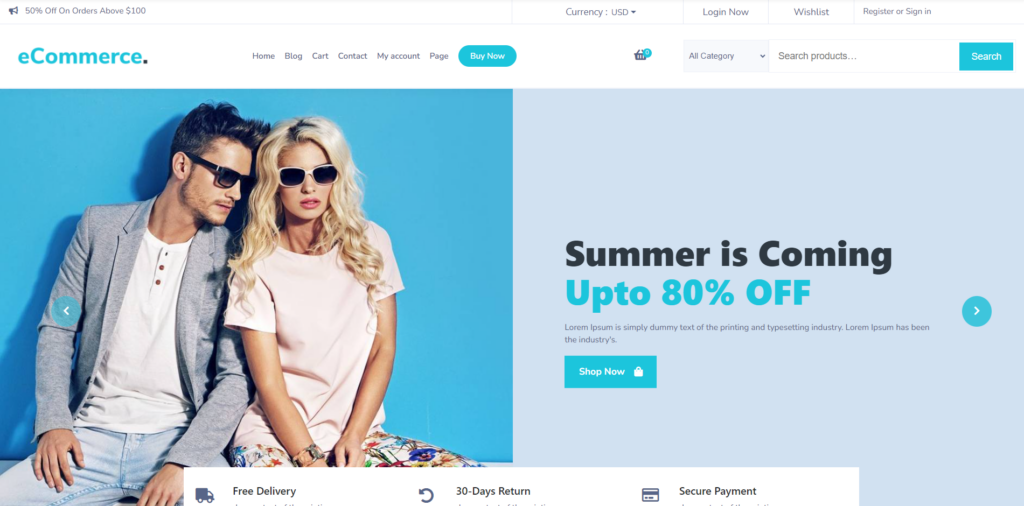
An e-commerce WordPress theme is a pre-designed template specifically crafted to facilitate the creation of online stores using the WordPress platform. Ecommerce themes come equipped with features and design elements tailored to showcase products or services effectively, streamline the shopping experience for customers, and support essential e-commerce functionalities such as product listings, shopping carts, and secure payment gateways. Also, with seamless integration with popular e-commerce plugins like WooCommerce, e-commerce WordPress themes empower businesses to establish professional and visually appealing online stores without the need for extensive coding or design expertise, making them an ideal solution for entrepreneurs and businesses looking to expand their online presence and drive sales.
An e-commerce WordPress theme is specifically designed to create online stores or websites that sell products or services. Key features of an e-commerce WordPress theme include:
- WooCommerce Integration: Seamless integration with WooCommerce, the leading e-commerce plugin for WordPress, allowing you to easily set up and manage your online store.
- Product Showcase: Provides attractive and customizable product showcase layouts to highlight your products effectively, including product grids, sliders, carousels, and featured product sections.
- Product Pages: Well-designed product pages with detailed product descriptions, images, pricing, variations (such as size and color), customer reviews, and call-to-action buttons to encourage conversions.
- Shopping Cart and Checkout: Provides a user-friendly shopping cart and checkout process with features like one-click add-to-cart, multiple payment gateways, guest checkout, and order tracking to streamline the buying process.
- Inventory Management: Basic inventory management features to track stock levels, manage product variations, set up low stock alerts, and automatically update product availability to prevent overselling.
- Customer Support: Access to customer support and documentation for assistance with theme setup, customization, and troubleshooting, ensuring a smooth and hassle-free experience for website owners.
b) Woocommerce StoreFront Theme
The WooCommerce Storefront theme is a sleek and customizable WordPress theme designed specifically for e-commerce websites powered by WooCommerce. Moreover, it offers seamless integration with WooCommerce, ensuring compatibility and optimal performance with the leading e-commerce plugin for WordPress. Also, with a responsive design that adapts to various screen sizes and devices, extensive customization options for colors, fonts, and layouts, and built-in templates for showcasing products and promotions, the WooCommerce Storefront theme provides a user-friendly and visually appealing platform for businesses to establish their online stores. Additionally, it is optimized for performance, accessibility, and search engine visibility, making it an ideal choice for businesses looking to make your own online store.
Some key features of the WooCommerce Storefront theme include:
- Seamless Integration: Designed to seamlessly integrate with WooCommerce, ensuring compatibility and smooth operation with the leading e-commerce plugin for WordPress.
- Optimized for Performance: Built with clean and lightweight code to optimize page loading speed and performance, enhancing user experience and search engine visibility.
- Accessibility Ready: Compliant with web accessibility standards to ensure all users, including those with disabilities, can access and navigate your online store easily.
- Built-in Blog: Includes a built-in blog feature to help you create engaging content, drive traffic to your website, and improve search engine rankings through regular updates and relevant articles.
- Documentation and Support: Offers comprehensive documentation and support resources, including tutorials, guides, and a dedicated support forum, to assist users with theme setup, customization, and troubleshooting.
- Regular Updates: Continuously updated to ensure compatibility with the latest versions of WordPress and WooCommerce, as well as to add new features and address any security vulnerabilities.
c) Shopkeeper WordPress Theme

The Shopkeeper WordPress theme is a versatile and feature-rich solution for building professional e-commerce websites. Designed specifically for online stores, Shopkeeper seamlessly integrates with WooCommerce, providing robust e-commerce functionality for businesses of all sizes. Also, with its responsive design, extensive customization options, and compatibility with popular page builder plugins, Shopkeeper offers unparalleled flexibility in creating unique and visually stunning online stores. Whether you’re selling physical products, digital downloads, or services, Shopkeeper empowers you to showcase your offerings effectively, drive sales, and create a seamless shopping experience for your customers.
Some key features of the Shopkeeper WordPress theme include:
- Multiple Layout Options: Offers a variety of layout options for your homepage, product pages, and blog, enabling you to create a unique and visually appealing online store.
- Drag-and-Drop Page Builder Compatibility: Integrates seamlessly with popular drag-and-drop page builder plugins like WPBakery Page Builder and Elementor, giving you even more flexibility in designing your website.
- Customizable Headers and Footers: Allows you to customize your website’s headers and footers with different layouts, styles, and content, providing a unique and branded experience for your visitors.
- Built-in Blog: Features a built-in blog section with various layout options, enabling you to create engaging content and drive traffic to your website.
- SEO-friendly: Optimized for search engines with clean code, fast loading times, and SEO-friendly structure, helping to improve your website’s visibility and ranking in search engine results.
- Translation Ready: Fully compatible with translation plugins like WPML and Polylang, allowing you to easily translate your website into multiple languages and reach a global audience.
Step 5 : Import demo
Importing a demo refers to the process of importing pre-designed website layouts, content, and settings from a demo or template to make your own online store. Also, this allows you to quickly set up your website with a predefined design and structure, saving time and effort in building your site from scratch. Here’s how it’s typically done:
- Choose a Theme: Select a WordPress theme that offers demo import functionality. Many premium themes come with multiple demo layouts that you can choose from.
- Install the Theme: Install and activate the WordPress theme on your website. You can do this by uploading the theme files through the WordPress dashboard or by installing it directly from the WordPress theme repository.
- Access Theme Options: Once the theme is activated, navigate to the theme options or settings page in your WordPress dashboard. Look for an option related to importing demos or demo content.
- Import Demo Content: Click on the option to import demo content. Follow the on-screen instructions to initiate the import process.
- Wait for Import to Complete: Depending on the size of the demo content and your internet connection speed, the import process may take a few minutes to complete. Be patient and wait for the import to finish.
- Review Imported Content: Once the import process is complete, you’ll typically see a message indicating that the demo content has been successfully imported. You can then visit your website to see the imported content, including pages, posts, images, and settings.
- Customize as Needed: After importing the demo content, you can customize your website further to suit your preferences.
Step 6 : Install woocommerce and other essential plugins
Install WooCommerce:
- Log in to your WordPress admin dashboard.
- Navigate to “Plugins” > “Add New”.
- In the search bar, type “WooCommerce”.
- Once WooCommerce appears in the search results, click the “Install Now” button.
- After the installation is complete, click the “Activate” button to activate the WooCommerce plugin on your website.
- Follow the on-screen setup wizard to configure basic settings for your online store, such as currency, payment methods, shipping options, and store location.
Install Essential Plugins:
- Depending on your specific needs and preferences, there are several essential plugins you may want to install alongside WooCommerce. Some examples include:
- Yoast SEO: Helps optimize your website for search engines and improve its visibility in search results.
- WPForms: Allows you to create contact forms, inquiry forms, and other types of forms to engage with your customers.
- MonsterInsights: Integrates Google Analytics with your website, providing valuable insights into your website’s traffic and performance.
- UpdraftPlus: Enables you to easily back up your website’s files and database to prevent data loss.
- W3 Total Cache or WP Super Cache: Improves website speed and performance by caching and optimizing website files.
Step 7 : Add products to your online store
Adding products to make your own online store is a fundamental process that involves showcasing your merchandise effectively to potential customers. Begin by logging into your website’s admin dashboard and navigating to the WooCommerce section. From there, access the “Products” tab and click on “Add New” to start creating a new product listing. Input the product’s name, description, price, and other relevant details, such as variations (e.g., size, color) and inventory levels. Furthermore, upload high-quality images to visually represent the product and entice buyers. Utilize categories and tags to organize your products and make them easier to find. Once all product information is entered, publish the listing, and it will be immediately available for purchase on your online store, allowing customers to explore and buy your products with ease.
Step 8 : Test and Launch your online store
Testing and launching your online store is a critical phase that ensures your website is fully functional, user-friendly, and ready for customers. Begin by thoroughly testing all aspects of your website, including functionality, responsiveness across various devices, compatibility with different web browsers, performance, security measures, and checkout process. Address any issues or inconsistencies discovered during testing to ensure a smooth and seamless experience for users. Once testing is complete and any necessary adjustments have been made, officially launch your online store by promoting it through marketing channels, announcing it on social media, and reaching out to your target audience. Continuously monitor your website’s performance post-launch and be prepared to make further optimizations as needed to enhance the user experience and drive sales.
Step 9 : Promote your online Store
Promoting your online store involves implementing various marketing strategies to increase visibility, attract customers, and drive sales. Start by optimizing your website for search engines (SEO) to improve its ranking in search results and drive organic traffic. Utilize social media platforms to engage with your audience, showcase your products, and run targeted advertising campaigns. Collaborate with influencers or bloggers in your niche to reach new audiences and gain credibility. Offer promotions, discounts, and loyalty programs to incentivize purchases and encourage repeat business. Moreover, leverage email marketing to stay in touch with customers, share updates, and promote special offers. Additionally, consider participating in online marketplaces, attending industry events, or collaborating with complementary businesses to expand your reach and increase brand awareness. By implementing a comprehensive promotional strategy, you can effectively grow your online store and attract a steady stream of customers.
Conclusion :
In conclusion, to make your own online store has never been more attainable. By following the outlined steps, you can navigate the process smoothly and with confidence. Begin by defining your vision and goals for the store, then choose the right platform that aligns with your needs and technical capabilities. Also, customize your store’s design to reflect your brand identity and ensure a seamless user experience. Moreover, add products with compelling listings and set up secure payment and shipping methods to facilitate transactions. Thoroughly test your website to iron out any issues before launching. Once live, gather feedback from customers and analytics data to make ongoing improvements and optimize for success. With dedication and the right tools, you can create a thriving online store that resonates with your audience and drives business growth.
Our WordPress bundle consists of premium-quality themes that are Woocommerce compatible. These themes are meticulously designed for building your online store. These themes are comprised with beautifully designed layouts and sleek functionalities. So, hurry up and buy our bundle now!