27 Mar
In WordPress website customization, to edit footer in WordPress holds significant importance. Whether adding copyright details, crucial links, or design elements, controlling the footer greatly enhances the site’s aesthetics and usability. This guide aims to simplify the process of editing the footer in WordPress, ensuring users can effortlessly implement desired changes. With control over the footer, website owners can tailor their sites to reflect their branding and provide essential information to visitors. By following the steps outlined in this guide, users can navigate through the editing process seamlessly, enabling them to achieve their desired footer layout and content. Ultimately, having the ability to customize the footer empowers website owners to enhance their site’s appearance and functionality, contributing to a more professional and user-friendly online presence.
Understanding the Footer:
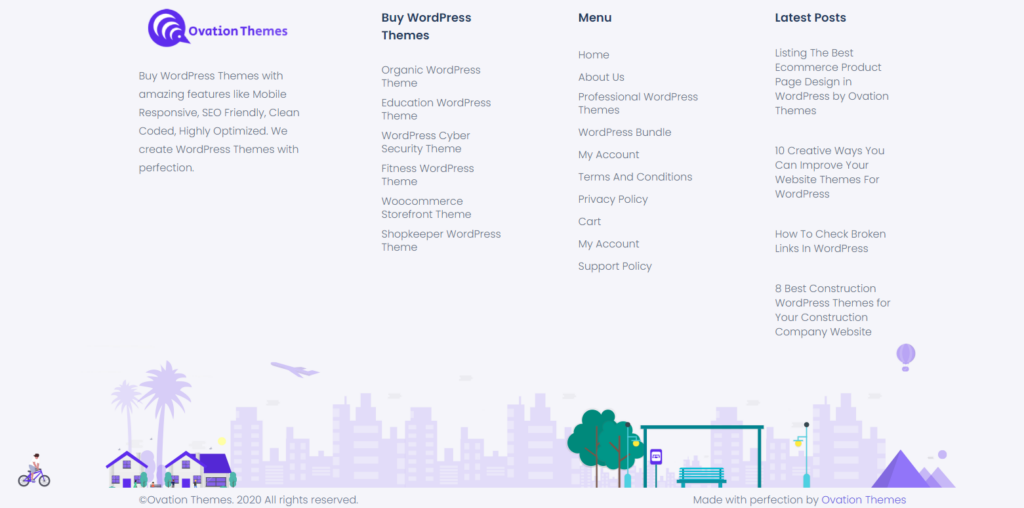
Before diving into the process to edit footer in WordPress, it’s crucial to grasp the significance of the footer on your website. Situated at the bottom of each webpage, the footer is a vital component containing essential information such as copyright notices, contact details, and links to significant pages. It acts as a navigational guide for visitors, facilitating easy access to key areas of your site. Beyond its functional aspects, the footer plays a crucial role in reinforcing your site’s branding and professionalism. By providing pertinent information and links, the footer enhances user experience, instills trust, and helps visitors navigate your site more efficiently. Additionally, a well-designed footer contributes to the overall aesthetics of your website, ensuring a cohesive and polished appearance. Understanding the importance of the footer sets the stage for effective customization, allowing you to optimize this section to better serve your website’s goals and objectives.
Best Practices for Editing the Footer:
- Keep it concise: When editing the footer in WordPress, it’s important to keep the content concise and focused. Avoid overwhelming visitors with excessive information or cluttered design elements. Stick to essential details such as copyright notices, contact information, and links to important pages. By keeping the footer clean and uncluttered, you ensure that visitors can easily find the information they need without feeling overwhelmed.
- Maintain consistency: Consistency is key when it comes to editing the footer in WordPress. Ensure that the design and layout of the footer match the overall aesthetics of your website and remain consistent across all pages. Consistent branding and design elements help create a cohesive and professional look, reinforcing your brand identity and enhancing user experience. Use the same color scheme, typography, and styling throughout the footer to maintain a unified appearance.
- Test your changes: After making edits to the footer, it’s essential to thoroughly test your website to ensure that everything displays correctly on different devices and screen sizes. Use responsive design testing tools to check how the footer appears on various devices, including desktops, laptops, tablets, and smartphones. Pay attention to spacing, alignment, and readability to ensure that the footer looks polished and functions seamlessly across all platforms. Testing your changes helps identify any issues or inconsistencies that need to be addressed before making the edits live on your website.
Methods to Edit the Footer:
WordPress offers several methods to edit footer in WordPress, ranging from using professional WordPress theme options to manually modifying theme files. Below, we’ll explore some of the most common methods:
A) Utilizing Theme Customizer
1. Access the Theme Customizer Navigate to your WordPress dashboard and click on “Appearance” in the left-hand menu. From the dropdown menu, select “Customize.”
2. Locate Footer Settings: Within the Theme Customizer interface, you’ll typically find footer settings under different sections depending on your theme. Look for options labeled “Footer” or “Footer Settings.”
3. Customize Footer Content: Once you’ve located the footer settings, you’ll likely have options to customize various aspects such as text, widgets, or columns. Depending on your theme, you may be able to add copyright information, social media icons, or custom text.
4. Preview Changes: As you make edits to the footer, the live preview pane in the Theme Customizer will reflect these changes in real-time. Take this opportunity to preview how your footer will look on different devices and screen sizes.
5. Save Changes: Once you’re satisfied with your edits, click the “Publish” button in the top-left corner of the Theme Customizer to save your changes and make them live on your website.
6. View Your Updated Footer: Visit your website to see the updated footer in action. Ensure that all elements are displaying correctly and that the footer aligns with your website’s overall design and branding.
B) Edit Footer in WordPress using Widgets
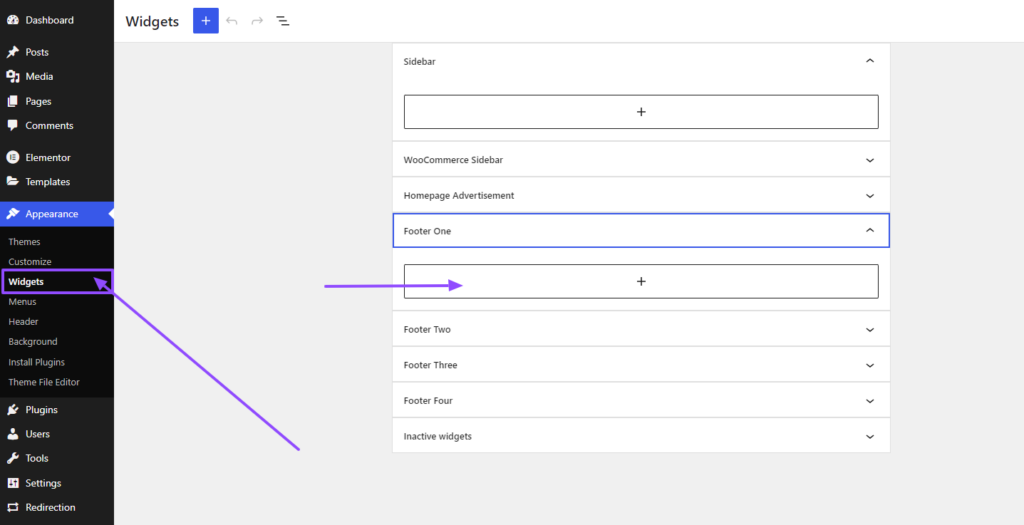
1. Access the Widgets Section: In your WordPress dashboard, navigate to “Appearance” and then click on “Widgets.”
2. Locate Footer Widget Areas: Once in the Widgets section, look for the widget areas dedicated to the footer. These areas are typically labeled as “Footer” or “Footer Widgets” and may be divided into multiple columns.
3. Add or Edit Widgets: Drag and drop widgets from the available widgets section into the footer widget areas. It is necessary to select a perfect WordPress theme because, depending on your theme and plugins installed, you may have various widgets to choose from, such as text, navigation menus, or custom HTML.
4. Configure Widget Settings: After adding a widget to the footer area, you can configure its settings, including title, content, and display options. Customize each widget to include relevant information or links for your website visitors.
5. Rearrange Widgets (Optional): If your theme supports it, you can rearrange the order of widgets within the footer widget areas by dragging and dropping them into the desired positions.
6. Save Changes: Once you’ve finished editing the footer widgets, click the “Save” or “Publish” button to apply your changes.
7. Preview Your Updated Footer: Visit your website to see the changes reflected in the footer. Ensure that all widgets are displaying correctly and that the footer layout aligns with your website’s design and branding.
C) Modifying Theme Files
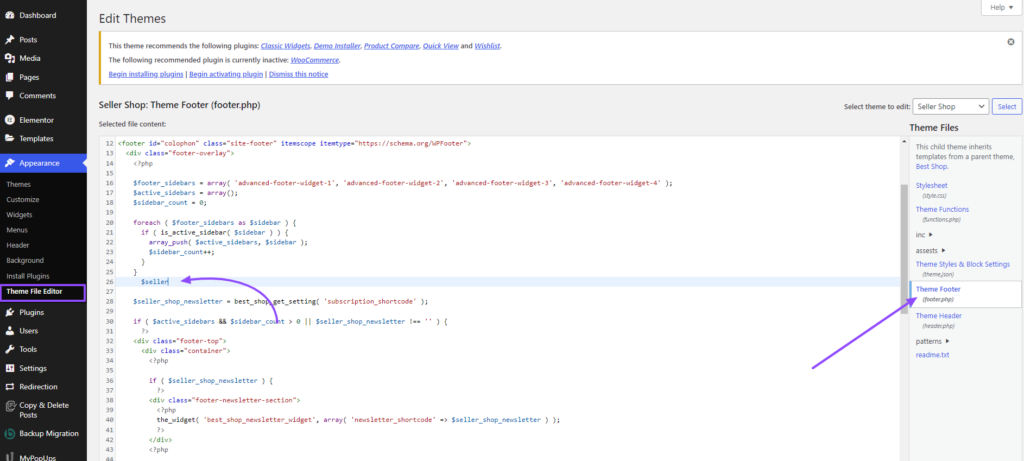
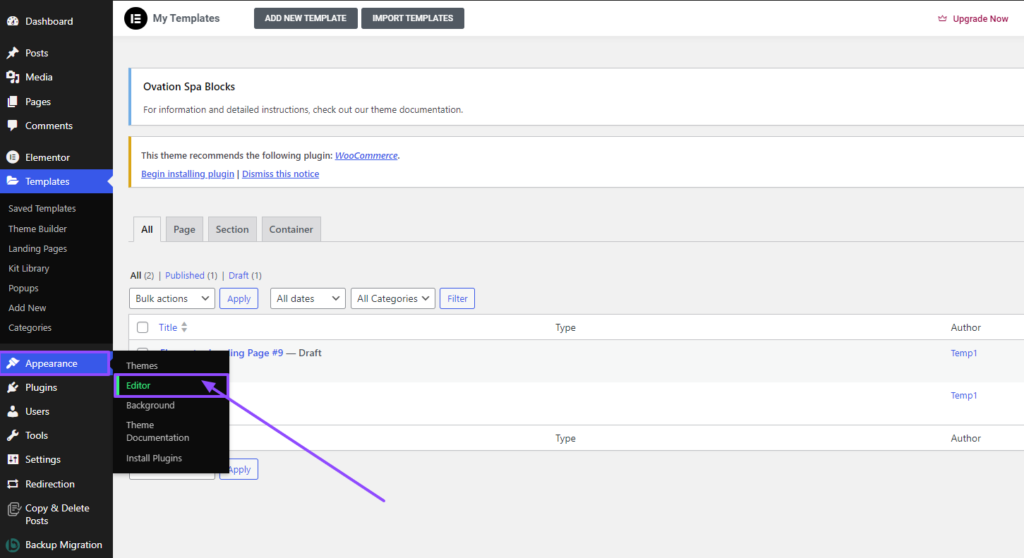
1. Access Theme Editor: From your WordPress dashboard, navigate to “Appearance” and then click on “Theme Editor.”
2. Locate Footer Template File: In the Theme Editor, you’ll see a list of theme files on the right-hand side. Look for the footer template file, typically named “footer.php” or similar.
3. Edit Footer Content: Click on the footer template file to open it in the code editor. Here, you can modify the HTML, CSS, or PHP code to make changes to the footer content.
4. Make Desired Changes: Depending on your requirements, you can add, remove, or modify elements within the footer, such as text, links, or design elements. Exercise caution while you edit footer in WordPress to avoid breaking your website.
5. Save Changes: After making the necessary modifications, click the “Update File” button to save your changes. WordPress will automatically update the footer section on your website with the edited content.
6. Preview Changes: Visit your website to see the updated footer in action. Ensure that all changes are displaying correctly and that the footer aligns with your website’s overall design and branding.
Conclusion:
Editing the footer in WordPress offers a versatile way to tailor your website’s appearance and functionality to suit your needs. Whether you’re incorporating copyright information, contact details, or supplementary navigation links, mastering the art of footer customization empowers you to craft a polished and user-friendly website. By following the steps outlined in this guide and adhering to best practices, you can seamlessly customize the footer to align with your brand identity and enhance the browsing experience for your visitors. Utilizing this flexibility enables you to create a cohesive and professional online presence that leaves a lasting impression. With careful attention to detail and a commitment to excellence, you can leverage the footer to effectively communicate important information and streamline navigation, ultimately enhancing the overall usability and accessibility of your WordPress website.
By leveraging the power of WordPress bundle of customizable themes, editing your website’s footer becomes an intuitive and streamlined process. Whether you’re updating text and links or adding widgets and custom code, WordPress provides the flexibility and functionality you need to edit footer in WordPress that perfectly complements your website’s design and serves your visitors’ needs effectively.
FAQs
- Why footer has so much importance in WordPress websites?
- Because footers are placed at the last and bottom part of the website. So when a visitor scrolls down the webpage, they can see the document information like page numbers, authors, dates, contact numbers, and other links repeatedly. So it helps them to navigate everything easily.
- Is Footer optimization necessary?
- Yes. It is necessary to enhance conversions, and search engine rankings. It also generates leads.
- Footer customization is mandatory?
- No. It is not mandatory at all. But customization is a whole process that makes the changes in your website. And any new change brings freshness to the site. It is a myth that the footer is the neglected part of any website. It is a wrong assumption. The header and footer are the two main parts of the webpage. It navigates you and takes you in the right direction.
- What type of information does a footer contain?
- Typically, the footer consists of a copyright notice, a link to a privacy policy, a sitemap, a logo, contact information, social media icons, and an email sign-up form.
How can we enhance the footer of the site?
To enhance the footer section and its design on your website, you need to keep the
following points in mind.
- Typically, the footer consists of a copyright notice, a link to a privacy policy, a sitemap, a logo, contact information, social media icons, and an email sign-up form.